How to set up Remote Viewing Yourself
Nearly all DVRs and NVRs come with a remote viewing feature.
Step [1] Configure the Network on the DVR or NVR
- Find the gateway then make up an IP for the DVR or NVR
- Usually the gateway is the router login IP
- For a large network, you need to discuss with the network administrator
- If you do not know your gateway search Google with keyword ' how to find gateway address'
- Here is one of link. http://www.noip.com/support/knowledgebase/finding-your-default-gateway/
- In New Zealand Vodafone devices usually use gate way 192.168.1.1. Telecom usually
use gateway of 192.168.1.254. This gateway refers to the local network gateway - The default IP address of AVTECH DVR is 192.168.1.10. We usually change it to
192.168.1.70 or something else according to your gateway - The default IP address of HIKVISION DVR is 192.0.0.64. We need to change it
to match the gateway. 'Match' means the first 3 group numbers need to be same.
The last group number needs to be different. - To configure the network setting on the DVR, you need to bring up the network
setting interface. For AVTECH DVRs, MENU - Advance Configuration – Network - Edit the IP and gateway
- The default port is 80, Usually we change it to something else i.e. 7070
- AVTECH DVRs only have one port. HIKVISION and Digiview DVRs and NVRs have 3 ports
- You will need to do port forwarding as the next step
- To do network setup of DVRs, you can also use software or IE browser to complete
the configuration by login to the DVR. - AVTECH system software is video viewer on windows OS.
Step [2] Port Forwarding
- Port forwarding on a router is can be a challenging task
- There are hundreds of modem routers available on the market. www.portforward.com
is a website that guides people on how to do port forwarding - You are going to open the port (i.e. 7070) and forward it to the DVR or NVR IP internally
and externally - There is millions of web pages available about port forwarding from Google. For example, http://www.dipolnet.com/how_to_forward_router_ports_to_view_online_video_from_a_dvr__bib516.htm is one of them
- For AVTECH DVRs you need to do only one port forwarding
- For HIKVISION DVRs you need to do 2 or 3 port forwarding
- Recently there is new technology (uPnP) available by automatically forwarding
through a Mac address. End users do not need to do port forwarding - Please refer to www.portforward.com for your router
- you may use http://www.canyouseeme.org to check if the port is open
Step [3] DDNS
- DDNS stands for dynamics DNS. DNS means domain name server
- If your broadband is on a static IP address, you do not need to set up the
DDNS for your system. So you can skip this step. If your broadband is on dynamic
IP, you will need to set up a DDNS either on the router or on the DVR - Usually we set up an account with www.dyndns.com, then enter a username, password and hostname to the DDNS session of a router or a DVR.
- The hostname will replace the IP as the actual IP is dynamic
- New models of AVTECH DVRs come with an Eagleeyes DDNS free account. It is quite
handy and easy. When you get into the DDNS session by MENU - Advanced Configuration
- Network, you will enter a hostname you like, and your email address. The setup
can be completed in less than 2 minutes - www.whatismyipaddress.com is a webpage to show your WAN IP address.
Step [4] Setup your Smart Phone, see instructions for each APP
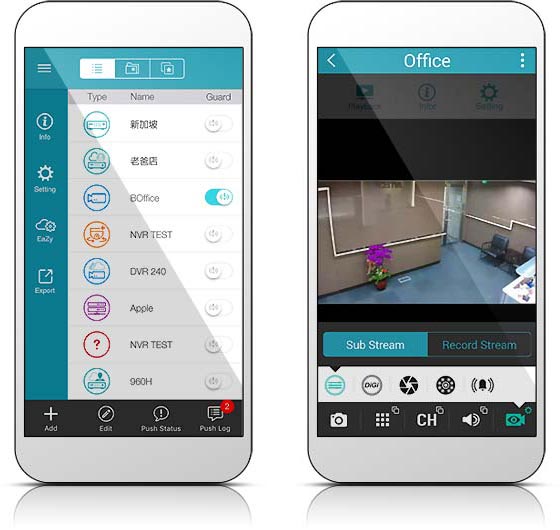
Avtech APP EagleEyes
To view your Avtech Video Recorder from your cellphone or Tablet download the Eagleeyes – Lite APP, this is a free APP, for help contact us on 0800 723 373

- Note: you will need Mobile Data on your phone
- Download the APP Eagle Eyes Lite from Playstore. Note: This is a Free APP
- Set up Remote Access - you must be on the same Wifi Router as your Video Recorder is connected to
Plug and Play
Easily complete the network configuration with Cloud EaZy Networking
Cloud EaZy Networking is developed for AVTECH products (DVR/NVR/IP cameras) to somplify network configuration by following steps below:
1. Connect RJ45 cable to a router hooking up with Internet
2. Download the AVTECH mobile app EagleEyes - and install
3. Register an account for EagleEyes Cloud Services on EagleEyes
4. Scan the barcode (on the monitoring display or on the device itself, depending on the device you have). You can manually enter the barcode
5. Enter the Captcha Code
- Then Click on the 3 Bars at the top left
- Scroll down to EaZy (3rd down see below)

- Then enter User Name: ?????
- Password: ?????
- Then Click on “Get Type” If you have loaded it successfully “DVR (?? Channel) will come up
- Then Click on “Save” (Top Right)
- Note: It is critical that the data is entered without spaces
HikVision APP Hik-Connect
To view your HikVision Video Recorder from your cellphone or tablet download the Hik-Connect APP, this is a free APP - for help contact us on 0800 723 373
- NOTE: you will need Mobile Data on your phone

- Download the APP Hik-Connect from Playstore. Note: This is a Free APP
Hik-Connect Setup Guide
Hik-Connect is a new service introduced by HikVision which integrates the dynamic domain name service (HiDDNS) along with alarm push notification service. It’s an easier, more secure way for devices to connect to the Internet whilst reducing the devices online digital security footprint and vector of attack, essentially keeping you safer from would-be hackers.
Hik-Connect’s P2P functionality allows connections outbound from your device (DVR/NVR/Camera) to the Hik-Connect service for alarm push notification and Live View. The new Hik-Connect APP is available on both the Apple Appstore and Goggle Play and is designed to work with HikVision series DVRs, NVRs and IP cameras which support Cloud P2P function. It allows you to Live View your cameras remotely without the need to enable UPNP and setup complex inbound port forwarding rules on your modem/router.
All you need to do is create an account and add your devices into it, then you can enjoy the real-time video from cameras on a global scale. It also allows you to play back recorded video to search alarm triggers. When motion detection alarm of your device is triggered, you can get an instant message notification (or emails if you prefer) from the Hik-Connect APP.
Key Features
Real-time monitoring
Video/Audio playback
Instant native iOS & Android notification
No port forwarding, UPNP or DDNS
Hik-Connect Set up Guide
Our new guide is for newer users to show them how to add Hik-Connect service with minimal downtime and fuss. If you need further support, simply contact us or leave a message.
HikVision recommends that you enable the UPnP function on both your router and device, or configure Port Forwarding manually in your router. Whilst now unnecessary it may still be required should you have other software or applications that require these services.
You still can use Hik-Connect service even if you don’t enable UPnP or configure ports forwarding manually; however, you cannot use Hik-Connect domain name service.
Please be aware that the images used in our setup guide may not be the same as yours as the software or firmware is updated over time. However, the information and settings required to setup Hik-Connect services are very similar across all supported products.
Preparation
Users need to upgrade your device(s) to the latest firmware that supports Hik-Connect Service. Contact us or visit HikVision directly to obtain the latest for your devices.
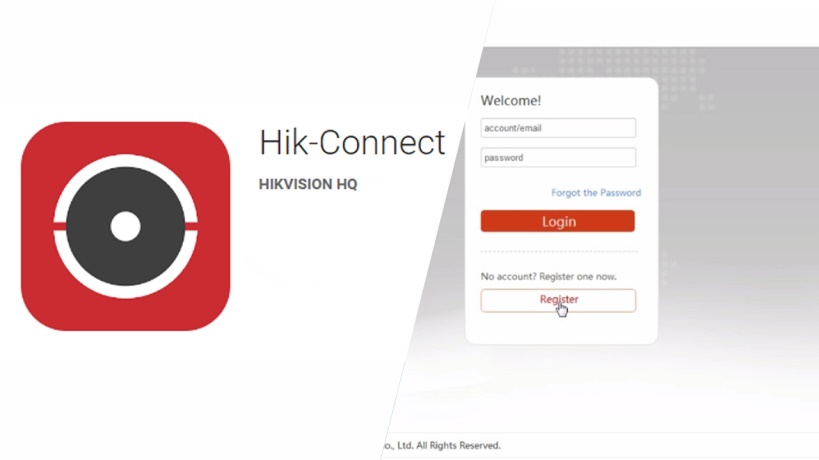
Register your FREE Hik-Connect account
Very straight forward- just visit the Hik-Connect web portal and register.
Short videos are available on the net if you seem stuck.
Adding devices into Hik-Connect account
Users can enable Hik-Connect function via Hik-Connect APP; www.hik-connect.com web portal; iVMS-4500 app or iVMS-4200 client.
Method 1: Add devices via Hik-Connect APP
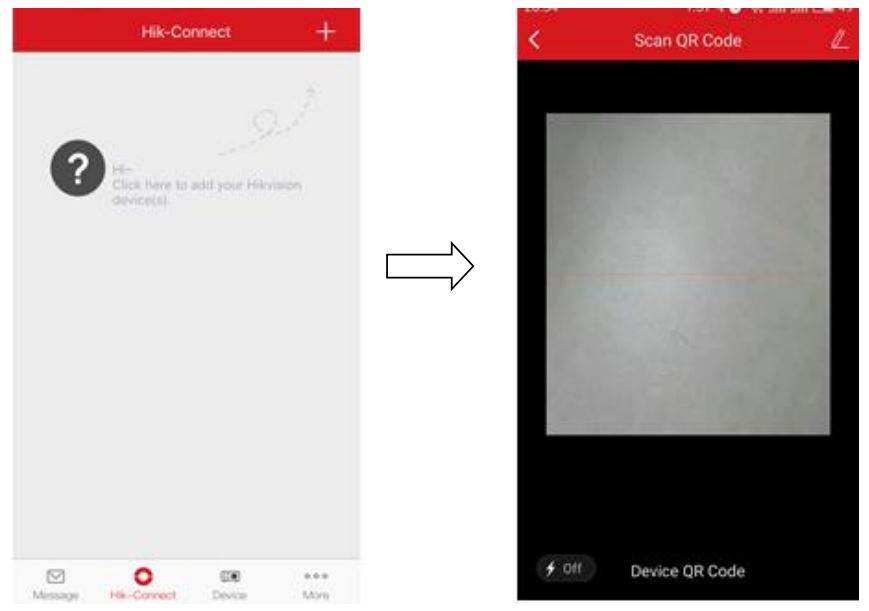
Run Hik-Connect APP at your mobile
Add the device by scanning device OR code or inputting device serial number manually
Once device is found, select or click ‘Add’ to continue
Input device verification code to finish
Go back to Hik-Connect and add all remaining devices

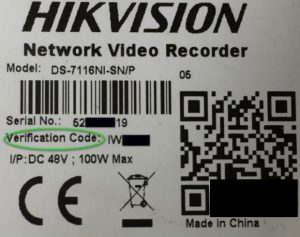
How to find the device verification code?
If you cannot find your verification code simply check the code on the label printed on the Network Video Recorder or IP Camera.
The verification code can also be found by logging into your devices GUI or directly from the NVR. This is handy if you have already installed your system

Method 2: Add devices via Hik-Connect web portal
- Type www.hik-connect.com into browser location bar
- Register an account and setup your password
- Login with your account user name and password
- Go to Device Management and click Add to add a device
- Input your device Serial number when prompted then click Search
- When a connection is made to the device a popup will show the model and confirm the S/N. If this is the desired device, Click ‘+’ to continue
- Confirm you get ‘Device configured correctly’ pop-up
- Double click on the IP address and Port No. of a connected device, a new window opens showing the login screen for the device. Enter the user name and password to login into the device

Simply open up or log back into to your mobile Hik-Connect application and ensure your devices are listed and synced up. Here’s another video of the whole process that may be easier for some:
Important Notes
We are getting a few messages from users who have purchased their equipment from overseas suppliers regarding not being able to connect their cameras to Hik-Connect. In all instances, these users have acquired Grey Market cameras running older firmware revisions. Updating this Grey Market sourced equipment can be problematic as they tend to revert to their original Chinese language if done so using official channels.
There also have been some issues where the verification code needed to complete adding cameras is not correct. If the verification method was via internet activation and does not work after a few codes you can either find the verification code on the camera itself (just above the serial number), via the SADP tool or by logging into the camera itself.
Note: It is critical that the data is entered without spaces